Paint Sprayer
After...
1 ft copper pipes
4 ft of ABS pipe
5 sheets of drywall
12 batches of mud
20 ft electrical cord
41 sheets of 1/2" CDX
65 ft of Pex
3,000 floor screws
We finally made it to painting. I used Sherwin Williams paint and primer and rented a paint sprayer for $20 a day. It took us 2.5 days to paint 1500 square feet of rooms and surfaces. We did two layers of Primer and two layers of paint.
Sherwin Williams suggested tinting the primer to the color and I am glad we did. I used Duration Washable Matte paint, cause let's face it, our walls and ceilings are not perfect, and I don't want every imperfection to shine.

While Atom was at work Friday, I picked up the paint and paint sprayer so I could get to work right away. Since I have never used a commercial paint sprayer I asked for a tutorial and permission to video the steps so I was sure not to make any mistakes. The guys at Sherwin Williams were very helpful.
If you have ever painted a room, you will know that painting is the easy part, all the work is in the paint prep. Making sure walls are clean, windows, trims tapped and all fixtures removed is labor intensive. Amongst the madness of trying to prep our fridge decided to take the #flauntyourwealthchallenge [ a Chinese social media trend from a few years ago]. This is why your shouldn't try to move your fridge with stuff in it.


I cut complicating everything by choosing the same color in every room. After carefully picking the right white shade, I know I can always go back and do accent walls and trim color later, but living in the space and getting to know what it's new face will need is more important. I chose a soft white, with this color, the room will look white but have a warmth to it.

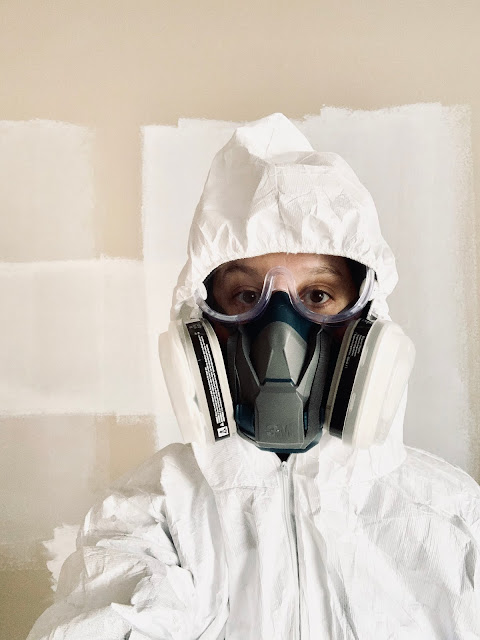
After sending Emma off to a sleepover and suiting up we got to work. I had one layer of primer complete by the time Atom came home and by midnight he completed the second, after a hearty breakfast we did another two layers the next day while painting doors in between.

The paint Sprayer has it's own learning curve, by the end of this project I felt like we had mastered it and when using it has it's place, where you can remove all furniture and textiles and seal off from overspray, I would use over and over again. I loved revealing the 70's brick fireplace, once the wood floors and other 70's style built ins are installed, the rooms will feel like their best mid century selves.
Next I need to research how to clean up the brick, having everything so fresh around it made me realize, after 50 years, it could use its own scrubbing.


The house looks like a fresh canvas. Our only big hiccup is when Rachel [my best besty, thank you again and again for helping with that] and I fetched the flooring this past summer we dropped it off in one of the upstairs spare bedrooms. This is good, because the wood has had months to acclimate, which reduces buckling and shifting after it has been installed. However, every step we did for the rest of the house will be repeated in that room this weekend. Which means carpet, subfloor and hardware removal, taping, primer and painting before they sand and finish the entire floor next week.

This week, I am going to relax, and spend some time shopping for lights and finishings that will suit a modern 70's home, while the floor guys do what they do best. We are using local contractors who are known for being "the guys" to lay these kinds of floors. "Mighty Oak Flooring" contractor Barry has been laying floors for 40 years, the solid wood floors came from a vendor in L.A. that a good friend/ interior designer hooked me up with [ thanks Jess with http://www.tandemdesigninteriors.com ] when I was in the throws of closing on the house this past summer. I had nothing decided at that point, other than, I should get these floors, and now look Jess, they are finally being installed!

1 ft copper pipes
4 ft of ABS pipe
5 sheets of drywall
12 batches of mud
20 ft electrical cord
41 sheets of 1/2" CDX
65 ft of Pex
3,000 floor screws
We finally made it to painting. I used Sherwin Williams paint and primer and rented a paint sprayer for $20 a day. It took us 2.5 days to paint 1500 square feet of rooms and surfaces. We did two layers of Primer and two layers of paint.

Sherwin Williams suggested tinting the primer to the color and I am glad we did. I used Duration Washable Matte paint, cause let's face it, our walls and ceilings are not perfect, and I don't want every imperfection to shine.

While Atom was at work Friday, I picked up the paint and paint sprayer so I could get to work right away. Since I have never used a commercial paint sprayer I asked for a tutorial and permission to video the steps so I was sure not to make any mistakes. The guys at Sherwin Williams were very helpful.
If you have ever painted a room, you will know that painting is the easy part, all the work is in the paint prep. Making sure walls are clean, windows, trims tapped and all fixtures removed is labor intensive. Amongst the madness of trying to prep our fridge decided to take the #flauntyourwealthchallenge [ a Chinese social media trend from a few years ago]. This is why your shouldn't try to move your fridge with stuff in it.


I cut complicating everything by choosing the same color in every room. After carefully picking the right white shade, I know I can always go back and do accent walls and trim color later, but living in the space and getting to know what it's new face will need is more important. I chose a soft white, with this color, the room will look white but have a warmth to it.

After sending Emma off to a sleepover and suiting up we got to work. I had one layer of primer complete by the time Atom came home and by midnight he completed the second, after a hearty breakfast we did another two layers the next day while painting doors in between.

The paint Sprayer has it's own learning curve, by the end of this project I felt like we had mastered it and when using it has it's place, where you can remove all furniture and textiles and seal off from overspray, I would use over and over again. I loved revealing the 70's brick fireplace, once the wood floors and other 70's style built ins are installed, the rooms will feel like their best mid century selves.
Next I need to research how to clean up the brick, having everything so fresh around it made me realize, after 50 years, it could use its own scrubbing.


The house looks like a fresh canvas. Our only big hiccup is when Rachel [my best besty, thank you again and again for helping with that] and I fetched the flooring this past summer we dropped it off in one of the upstairs spare bedrooms. This is good, because the wood has had months to acclimate, which reduces buckling and shifting after it has been installed. However, every step we did for the rest of the house will be repeated in that room this weekend. Which means carpet, subfloor and hardware removal, taping, primer and painting before they sand and finish the entire floor next week.

This week, I am going to relax, and spend some time shopping for lights and finishings that will suit a modern 70's home, while the floor guys do what they do best. We are using local contractors who are known for being "the guys" to lay these kinds of floors. "Mighty Oak Flooring" contractor Barry has been laying floors for 40 years, the solid wood floors came from a vendor in L.A. that a good friend/ interior designer hooked me up with [ thanks Jess with http://www.tandemdesigninteriors.com ] when I was in the throws of closing on the house this past summer. I had nothing decided at that point, other than, I should get these floors, and now look Jess, they are finally being installed!


Comments
Post a Comment