Subfloor Removal
I wish I could to tell you that there is some magical way to remove layers of subfloor, it seems to have been the theme of this renovation. Just as I was chortling about the great accomplishment of removing four layers of it in the kitchen, we found out we had to remove a layer throughout the entire house. [ see A Big Costly Risk as to why ]
Lucky enough for us, Emma and Bear [the dog] stayed in Montana with their Nanas after a relaxing, drinking, puzzles and games Christmas.
Emma and Bear staying with the Nana's could have been the best gift of all, because Atom and I came home and literally tore up the house. Leaving an unsafe, loud, messy wake behind us. But not first without stopping on our 5 hour drive home from Montana to pick up some new toys... I mean tools. Adding to our repertoire we purchased an edge cutter [ this cuts the subfloor flush to the wall ], more blades for the skill saw, a 4ft/35 lb crow bar and for Christmas I got a new set of work gloves. Below are ALL the tools we needed to do this job.
We started with slicing the floor with the skil saw and edge cutting along all the walls.

I found that when I cut on one side along the nails, We could get leverage from the further end without nails, we had more success with pulling up larger pieces.
With one person using the mini sledge and crow bar to peel apart the layers and one person lady-handling the giant crow bar for momentum we successfully pulled up all the subfloors.

Sometimes the floors came up in satisfying large pieces, and sometimes it came in tiny painful shards, but there was usually a trigger happy culprit for the more difficult areas. Like this photo at our entry way, of about 35 nails a square foot.
We finished off the weekend with widening the kitchen doorway, it's only a foot, but helps with traffic flow and making the kitchen more apart of the rest of the house.

Next is laying new 1/2" CDX board [plywood], more clean up [always more clean up], but we are nearly back on track.
Shout out to Rachel and Nels, who stepped in and helped out with some of the painful remnants of this project and treated us with a double feature of Deadpool, where we could relax and drink our achy muscles away.
Lucky enough for us, Emma and Bear [the dog] stayed in Montana with their Nanas after a relaxing, drinking, puzzles and games Christmas.
 |
| All she wanted for Christmas was this giant Dog. The Nanas came thru. |
 |
| These are the Nanas, Aren't they cute? |
Emma and Bear staying with the Nana's could have been the best gift of all, because Atom and I came home and literally tore up the house. Leaving an unsafe, loud, messy wake behind us. But not first without stopping on our 5 hour drive home from Montana to pick up some new toys... I mean tools. Adding to our repertoire we purchased an edge cutter [ this cuts the subfloor flush to the wall ], more blades for the skill saw, a 4ft/35 lb crow bar and for Christmas I got a new set of work gloves. Below are ALL the tools we needed to do this job.
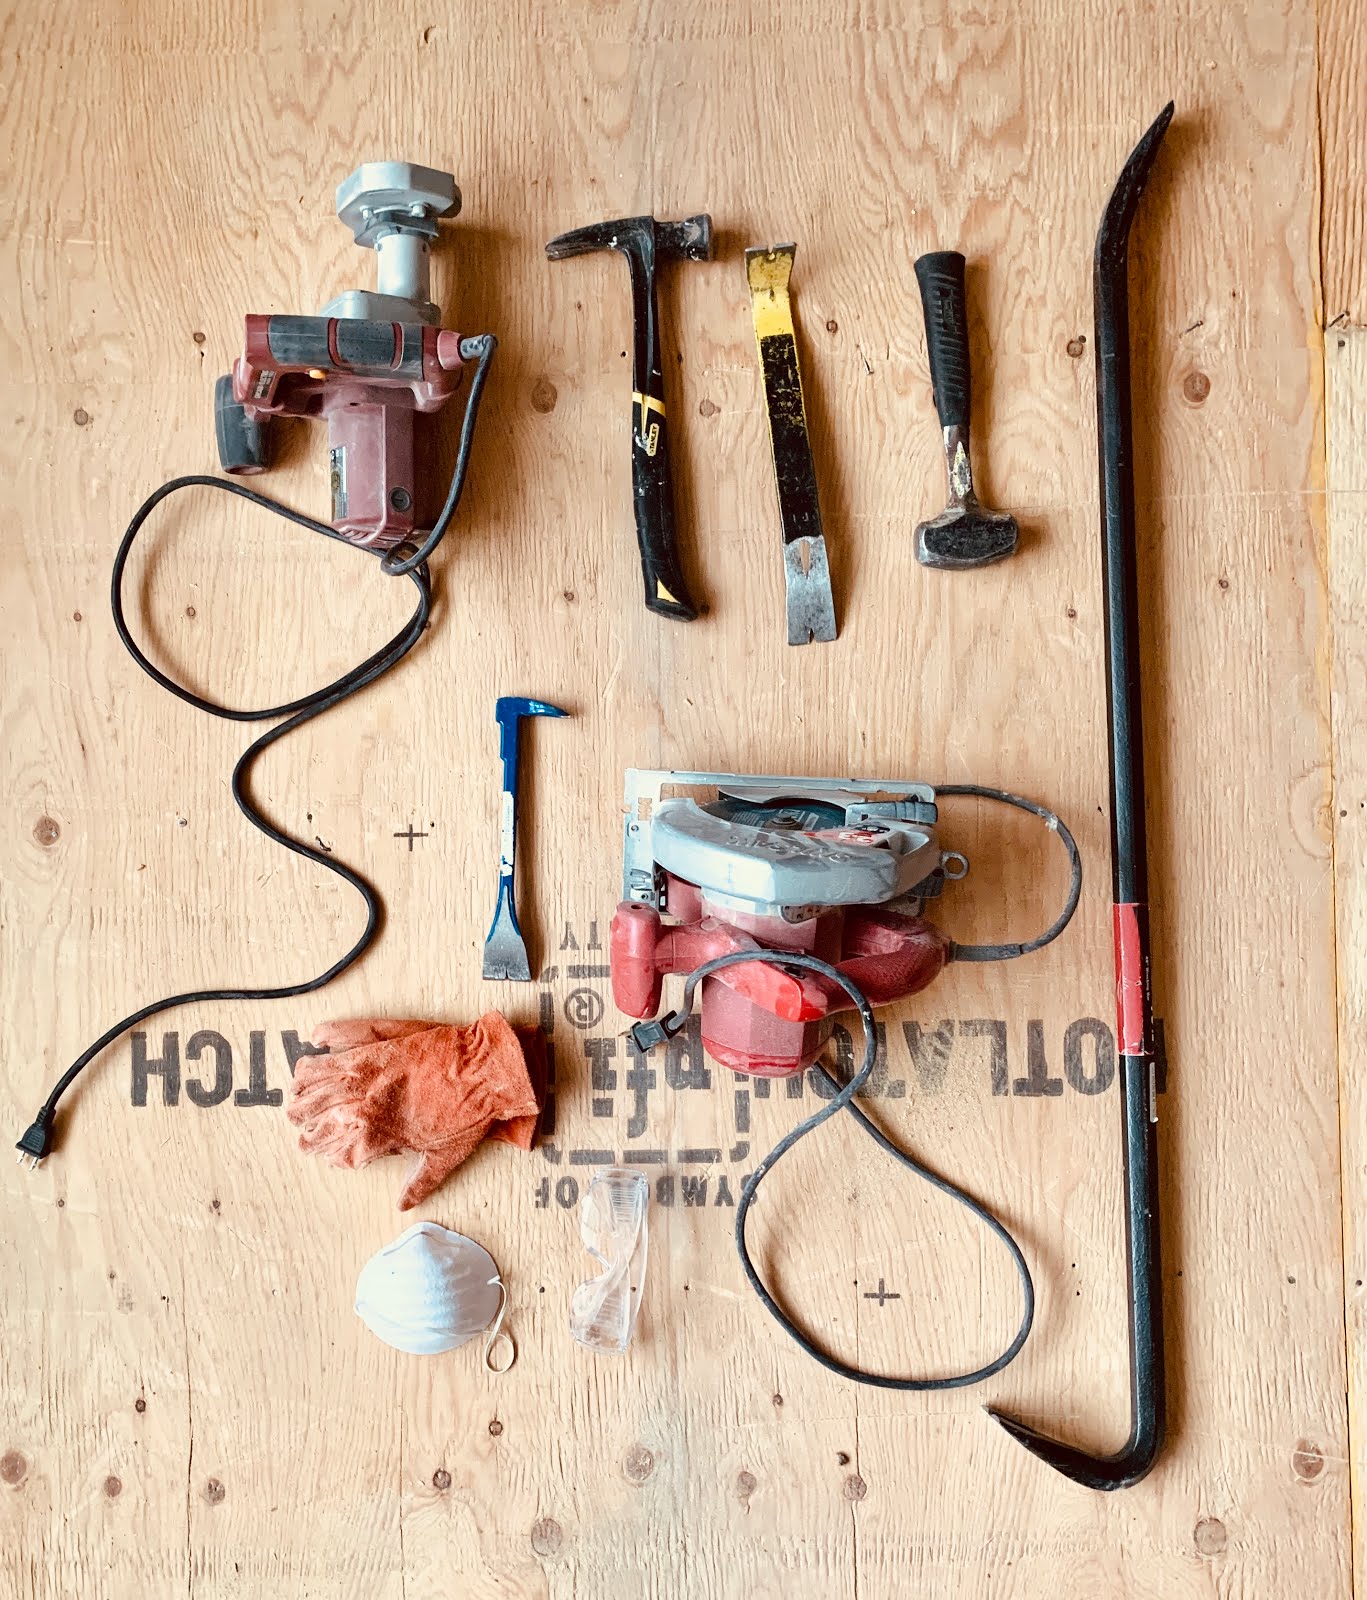 |
| top left: edge cutter, hammer, crow bar, mini-sledge, 35 lb crow bar below: cat/bear paw, skil saw, safety: gloves, glasses and mask [safety first and don't breath that shit in]. |
We started with slicing the floor with the skil saw and edge cutting along all the walls.

I found that when I cut on one side along the nails, We could get leverage from the further end without nails, we had more success with pulling up larger pieces.
With one person using the mini sledge and crow bar to peel apart the layers and one person lady-handling the giant crow bar for momentum we successfully pulled up all the subfloors.

Sometimes the floors came up in satisfying large pieces, and sometimes it came in tiny painful shards, but there was usually a trigger happy culprit for the more difficult areas. Like this photo at our entry way, of about 35 nails a square foot.
 |
Doing this we found some soft spots in the floor that were in need of reinforcing to avoid flexing, we did this by opening the original subfloor and adding more support. Plenty of youtube videos on how to do this and no additional cost since we repurposed lumber.
I watched this and a few other videos to get an idea of how to solve and we went from there.
TURN DOWN VOLUME, THE MUSIC IS DUMB.
|
We finished off the weekend with widening the kitchen doorway, it's only a foot, but helps with traffic flow and making the kitchen more apart of the rest of the house.

Next is laying new 1/2" CDX board [plywood], more clean up [always more clean up], but we are nearly back on track.
Shout out to Rachel and Nels, who stepped in and helped out with some of the painful remnants of this project and treated us with a double feature of Deadpool, where we could relax and drink our achy muscles away.


HOLY HELL
ReplyDelete